A Step-by-Step Guide to NotifEase: Push Notifications for Solana Mobile Stack on React Native

Elevate Your App’s Engagement with NotifEase, Solana’s Seamless Push Notification SDK for React Native
Introduction
In the fast-paced world of mobile app development, user engagement stands as a pivotal factor for success. With the Solana Mobile Stack, developers gain access to cutting-edge tools designed to enhance user interaction and retention. Among these tools is NotifEase, the Push Notification SDK tailored specifically for React Native applications. In this comprehensive guide, we’ll walk through the step-by-step process of leveraging NotifEase to send push notifications, empowering you to captivate and retain your audience like never before.
How NotifEase is helping developers?
To streamline the process of sending push notifications, NotifEase emerges as the ultimate solution for developers seeking seamless engagement with their audience. Unlike traditional methods that often necessitate complex server setups and intricate configurations, NotifEase empowers users to kickstart their notification journey instantly. Here’s how NotifEase simplifies the notification process:
Instant Setup, Zero Server Hassle: With NotifEase, developers can bid farewell to the cumbersome task of setting up and maintaining servers dedicated to push notifications. By leveraging NotifEase’s intuitive platform, users can dive straight into sending notifications without grappling with server complexities.
Effortless Audience Management: NotifEase equips developers with robust tools to manage their audience effortlessly. From segmenting users based on various on-chain and off-chain activities to curating personalized notification campaigns, NotifEase offers unparalleled flexibility in audience management.
Targeted Notifications: With NotifEase, developers can precisely target their notifications to specific user segments based on a myriad of criteria. Whether it’s triggering notifications in response to on-chain transactions, user interactions within the app, or predefined events, NotifEase ensures that each notification resonates with its intended audience.
Subscription to Various Topics: NotifEase introduces the concept of topic subscriptions, allowing users to subscribe to specific topics of interest within the app. This enables developers to tailor notifications according to users’ preferences, ensuring that each notification adds value and relevance to the user experience.
Automation for Efficiency: Gone are the days of manual notification dispatching. NotifEase offers advanced automation features, enabling developers to schedule and automate notification delivery based on predefined triggers and conditions. This automation not only enhances efficiency but also ensures timely and consistent communication with users.
Seamless Integration with Solana Mobile Stack: As part of the Solana ecosystem, NotifEase seamlessly integrates with the Solana Mobile Stack, harnessing its unparalleled scalability and performance. This integration not only ensures lightning-fast delivery of notifications but also provides developers with access to a robust ecosystem of tools and resources for app development.
Developing With NotifEase
Let’s start by creating a React Native app with the command:
npx react-native init notificationsApp
follow on from getting Started page to setup react-native-firebase in your app
Getting Started | NotifEase Docs
Setting up React Native App
After setting up firebase messaging head on to Create your app on NotifEase, for detailed tutorial:
Create a new App | NotifEase Docs
Creating a new app in dashboard
After creating new app, you can access your app secret from your dashboard, see user analytics, send community alerts, manage topics.
Install And setup Solana Mobile Stack and NotifEase SDK
npm install \
  @solana/web3.js \
  @solana-mobile/mobile-wallet-adapter-protocol-web3js \
  @solana-mobile/mobile-wallet-adapter-protocol \
  react-native-get-random-values \
  buffer notifease
To load the polyfills, we open the file index.js in the root of the project and add the following two lines to the top of the file:
import "react-native-get-random-values";
import { Buffer } from "buffer";
global.Buffer = Buffer;

// Place the App component import below your polyfill imports!
import App from "./App";
Create a Component for Connect Button
export default function ConnectButton({onConnect}: ConnectButtonProps) {
  const onPress = async () => {
    await transact(async wallet => {
      // Transact starts a session with the wallet app during which our app
      // can send actions (like `authorize`) to the wallet.
      const authResult: AuthorizationResult = await wallet.authorize({
        cluster: 'devnet',
        identity: APP_IDENTITY,
      });
      const {accounts, auth_token} = authResult;

      // After authorizing, store the authResult with the onConnect callback we pass into the button
      onConnect({
        address: accounts[0].address,
        label: accounts[0].label,
        authToken: auth_token,
        publicKey: getPublicKeyFromAddress(accounts[0].address),
      });
    });
  };
  return (
    <TouchableOpacity style={styles.button} onPress={onPress}>
      <Text style={styles.buttonText}>Connect Wallet</Text>
    </TouchableOpacity>
  );
}
in MainScreen
import NotifEase from "notifease"
import messaging from '@react-native-firebase/messaging'
export default function MainScreen() {
  const {connection} = useConnection();
  const [message, setMessage] = useState<string>('');
  const [authorization, setAuthorization] = useState<Authorization | null>(
    null,
  );
const [token,setToken] = useState<string>('')
const Sdk = new NotifEase("YOUR_APP_SECRET")
 useEffect(()=>{
    getTokenAsync()

  },[])

  const getTokenAsync = async()=>{


    const token = await messaging().getToken()
    console.log("token",token)
setToken(token);
  }
  useEffect(() => {
    const unsubscribe = messaging().onMessage(async remoteMessage => {
      Alert.alert('A new FCM message arrived!', JSON.stringify(remoteMessage));
    });

    return unsubscribe;
  }, []);
  return (
    <>
      <View style={styles.mainContainer}>
        <ScrollView contentContainerStyle={styles.scrollContainer}>
          <View style={styles.header}>
            <Text style={styles.headerText}>Hello Solana!</Text>
          </View>

          {/* Text Input */}
          <View>
            <Text style={styles.inputHeader}>What's on your mind?</Text>
            <TextInput
              style={styles.input}
              numberOfLines={1}
              onChangeText={text => setMessage(text)}
              placeholder="Write your message here"
            />
          </View>
        </ScrollView>
        <ConnectButton
          onConnect={async (authorization: Authorization) => {
            setAuthorization(authorization);
sdk.registerUser(authorization.address,token)
          }}
        />
      </View>
    </>
  );
}
Above Code will register app user to your app for receiveing Notifications,
Displaying Notifications:
In your Index.js file paste the below code
import messaging from '@react-native-firebase/messaging';


// Register background handler
messaging().setBackgroundMessageHandler(async remoteMessage => {
  console.log('Message handled in the background!', remoteMessage);
});
messaging().getInitialNotification(async remoteMessage => {
    console.log('Message handled in the kill!', remoteMessage);
  });
Sending Notifications from NotifEase Dashboard
Login to Your Organisation and Navigate to preferred App Notification Section
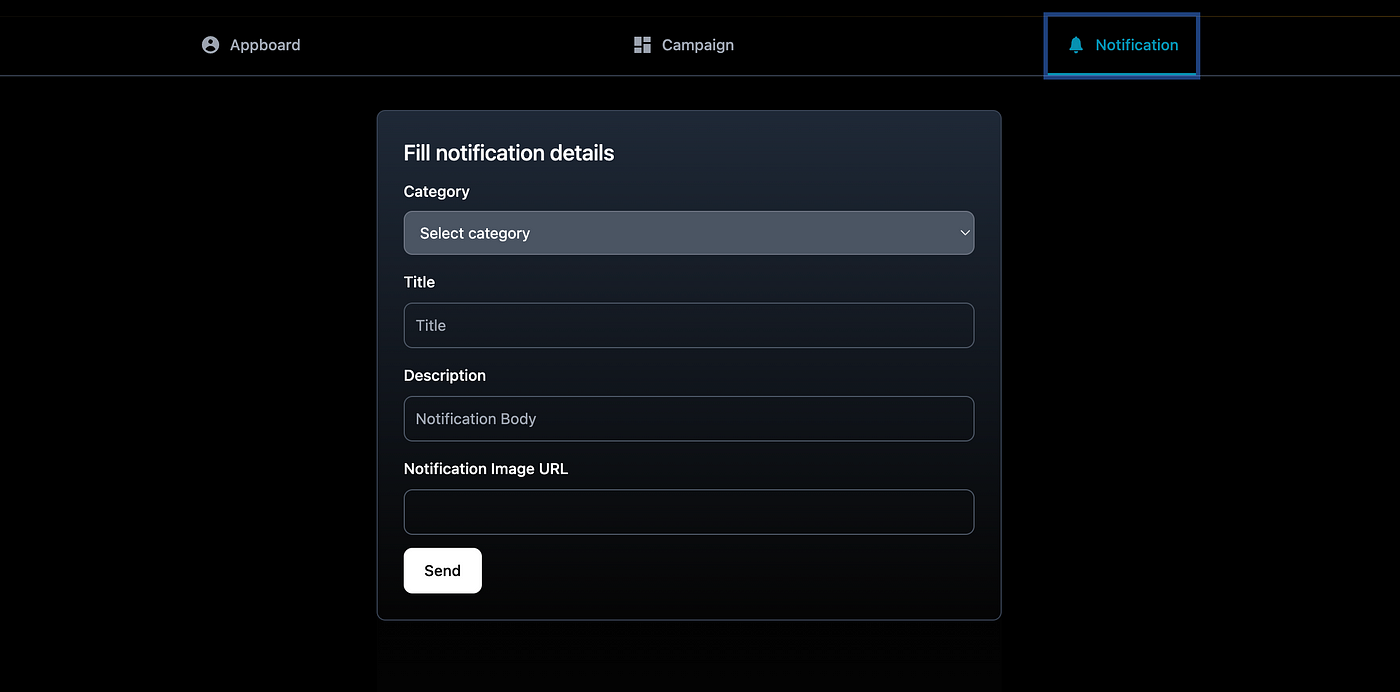
select category to BROADCAST to send notifications to all users or filter create a topic to send to specific groups, enter notification title,body,imageUrl.
Hit Send Button!
And you have successfullt sent Notification to All Users.
It was that Easy….